

If your characters look stiff or flat, perspective is usually the missing piece—not detail, not style, not cleaner lines. The fix isn’t complicated grids or heavy theory. It’s learning how to see your character in space.
This guide keeps things practical and beginner-friendly, focusing on how perspective actually shows up in anime and manga drawing.
What does “perspective” mean in anime drawing?
Perspective is how size, distance, and angle change how your character appears, so they feel like they exist in space instead of sitting flat on the page.
At its simplest:
- Things closer look bigger
- Things farther away look smaller
- Angles shift based on your viewpoint
Everything else builds on these ideas.
In anime, perspective isn’t about perfect architecture or technical accuracy—it’s about presence. A hand reaching toward the viewer, a dramatic low-angle pose, a tilted head with depth—those moments rely on perspective.
A useful way to think about it is a camera. Imagine your character is being filmed. Where is the camera placed—eye level, above, below? That single choice shapes the entire drawing.
Is perspective different in anime vs realistic art?
The rules stay the same, but anime pushes and simplifies them.
Anime doesn’t ignore perspective—it stylizes it. Proportions may stretch or exaggerate, but the underlying sense of depth still follows real-world logic.
In fact, exaggeration often makes perspective clearer. A large foreshortened hand or a dramatic angle isn’t a mistake—it’s perspective being used intentionally.
Why perspective matters more than details
Depth creates impact—details only enhance it.
You can polish lineart, refine hair, and render clothing, but if the character feels flat, something will always feel off.
A simple sketch with strong depth feels more alive than a detailed drawing with no sense of space.
That’s why at Dattebayo, the focus starts with structure and depth before polish.
Why do your anime characters look flat?
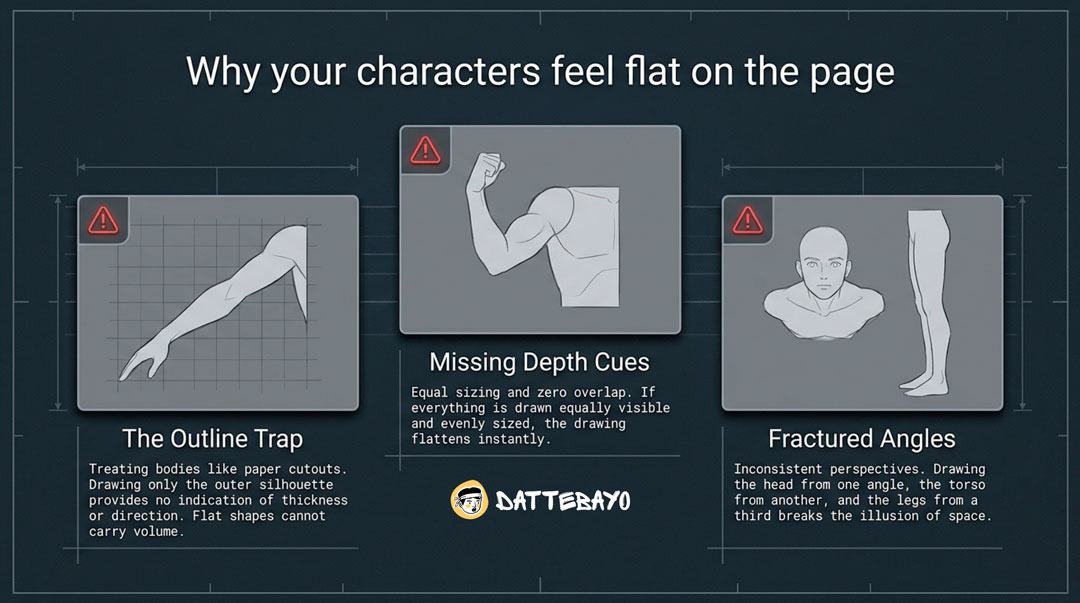
They look flat when they’re treated like outlines instead of 3D forms, and when depth cues are missing.
Most beginners aren’t doing anything “wrong”—they just haven’t trained their eye for space yet.
The outline-only mistake
Flat shapes don’t carry volume.
If you draw only the outer silhouette, there’s no indication of thickness or direction. It’s like cutting a shape out of paper—it has height and width, but no depth.
That’s why a drawing can look “clean” but still feel off.
Ignoring size and overlap
Depth becomes visible when forms interact.
Two of the strongest visual cues are:
- Size change (closer = bigger)
- Overlap (one form blocking another)
If everything is equally visible and evenly sized, your drawing flattens instantly.
Inconsistent angles across the body
If each part follows a different perspective, the illusion breaks.
A common issue: the head is drawn from one angle, the torso from another, and the legs from a third. Each part might look fine alone, but together they don’t feel connected.
Think of the body as one object in space, not separate pieces.
The only perspective basics you actually need
You don’t need complex grids—just a clear sense of eye level, viewing angle, and depth direction.
Focus on these:
- Horizon line = your eye level
- Viewing angle = looking up, down, or straight
- Depth direction = where forms recede
That’s enough to draw convincing characters.
A quick example using a simple box (torso)
A box makes perspective easy to understand.
Picture the torso as a box:
- Looking down → you see the top plane
- Looking up → you see the bottom plane
- Eye level → mostly the front
This applies directly to the ribcage and hips.
When these basics matter most
They become critical as soon as your pose isn’t straight-on.
A neutral front view hides perspective. But tilt the camera or push a dynamic pose, and perspective suddenly does all the heavy lifting.
That’s why learning it early helps—especially if you want to draw dynamic poses.
How to think in 3D (without overcomplicating it)
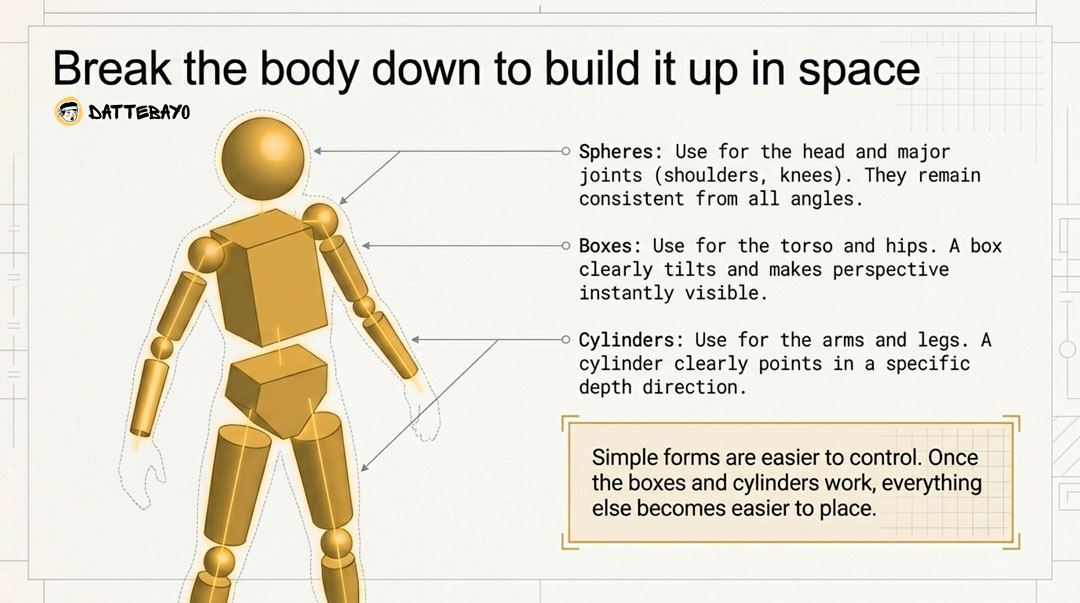
Break the body into simple forms and imagine how they sit and rotate in space.
Instead of jumping straight to details, think in:
- Boxes (torso, hips)
- Cylinders (arms, legs)
- Spheres (head, joints)
This isn’t about making your drawing look geometric—it’s about giving yourself structure.
Why simple forms solve most problems
Simple forms are easier to control and adjust.
A box clearly tilts. A cylinder clearly points somewhere. These forms make perspective visible and manageable.
Once they work, everything else becomes easier to place.
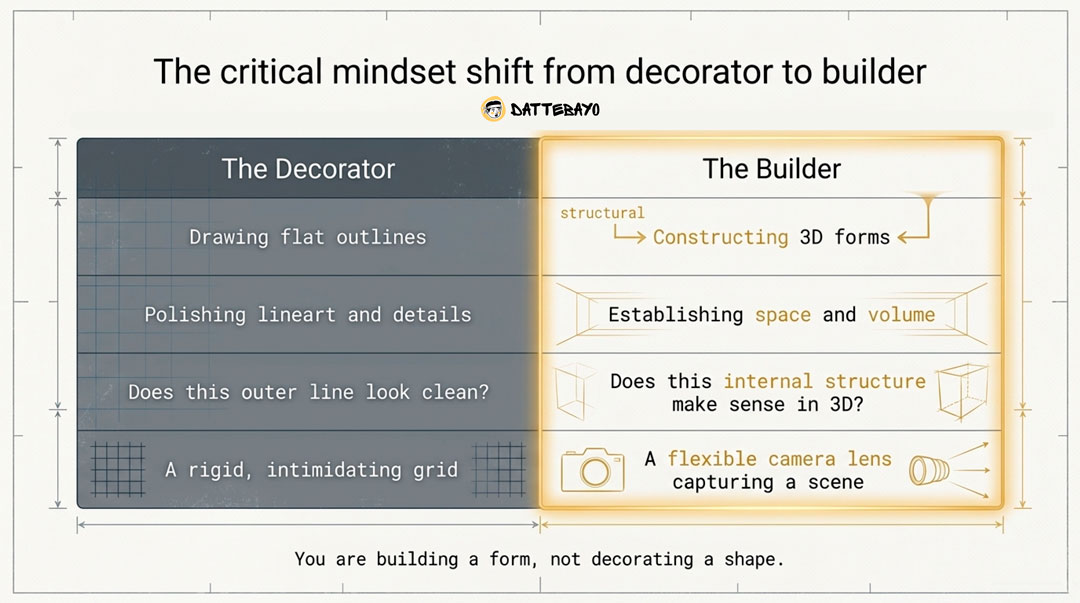
From lines to structure: the key mindset shift
You’re building a form, not decorating a shape.
Instead of asking “Does this line look right?”, ask “Does this make sense in 3D?”
That shift is a big part of how Dattebayo teaches drawing—prioritizing clarity so you’re not guessing your way through each pose.
How to draw a full anime character in perspective (simple workflow)
Start with a clear viewing angle, build with simple forms, adjust proportions for depth, then refine.
This isn’t about rigid steps—it’s a way of thinking that keeps your drawing consistent.
- Decide the camera angle first
- Build the torso as a 3D form
- Attach limbs with clear direction
- Adjust size based on distance
- Use overlap to reinforce depth
Example: drawing a character reaching toward the viewer
Closer parts expand, farther parts compress.
- The hand appears larger
- The arm visually shortens (foreshortening)
- The torso and legs recede
If everything stays the same size, the effect disappears.
Common mistakes during the process
Most issues come from playing it safe.
Watch for:
- Resizing parts instead of restructuring them
- Avoiding overlap because it feels messy
- Flattening forms to make them easier to draw
If perspective feels “wrong,” it’s often because it’s new, not incorrect.
How to draw anime faces at different angles
Treat the head as a 3D form and let your guidelines wrap around it.
A flat approach falls apart the moment you rotate the head. Structure keeps everything aligned.
If this is a sticking point, it helps to revisit head construction basics—Dattebayo’s anime drawing course explains this in a very beginner-friendly way.
Why faces break when rotated
Features are placed as if they’re on a flat surface.
But in reality, they sit on a curved form.
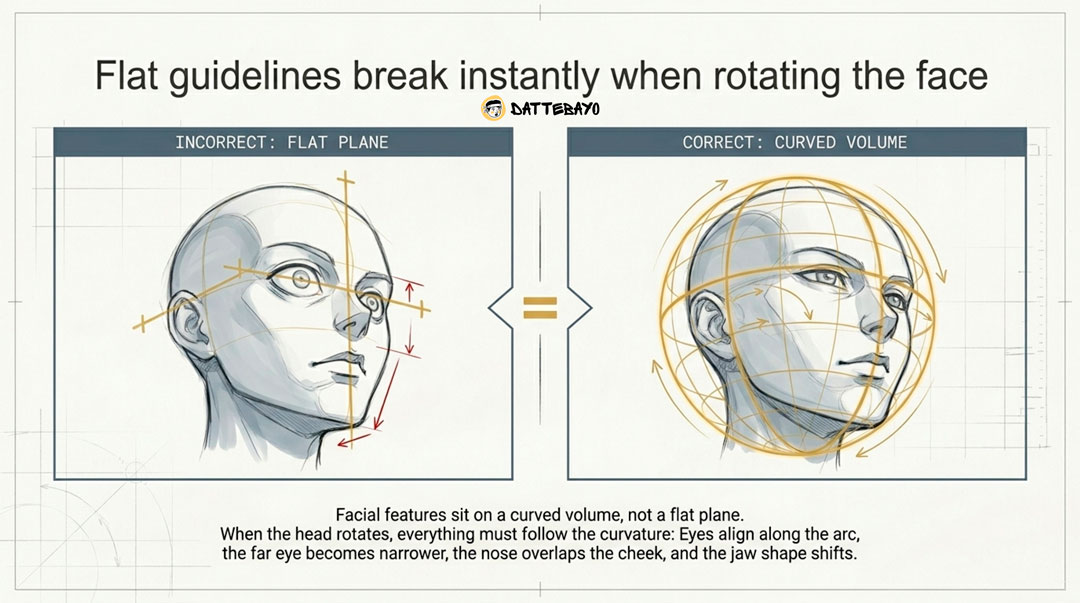
How features shift with angle
Everything follows the direction of the head.
- Eyes align along a curve
- The far eye appears narrower
- The nose overlaps differently
- The jaw changes shape with tilt
Flat guidelines lead to flat faces.
Why proportions change (and why that’s a good thing)
Proportions shift because of foreshortening—and that’s what creates depth and motion.
This is where many drawings start to feel “off,” but it’s actually a sign you’re getting closer.
Foreshortening made simple
Closer = bigger, farther = smaller—applied to body parts.
An arm reaching forward doesn’t just extend—it compresses in length while expanding in size.
Overlap + foreshortening = strong depth
These two cues work best together.
- Foreshortening changes size
- Overlap shows which part is in front
Use both, and your character immediately feels more solid.
How to practice perspective without getting overwhelmed
Keep it simple, focused, and consistent—short sessions with clear goals beat long, unfocused ones.
You don’t need more time—you need better direction.
The easiest daily practice method
Short अभ्यास sessions build real progress.
Try:
- 10–15 minutes
- Boxes and cylinders at different angles
- Simple mannequin-style figures
Consistency matters more than intensity.
Using references the right way
Observation speeds up learning—guessing slows it down.
Useful sources:
- Pose reference apps
- Photos of people
- 3D mannequins
- Anime screenshots
Even professional artists rely on references. It’s not a shortcut—it’s part of the process. Platforms like Sketchfab or pose tools have become especially popular for studying 3D angles in recent years.
How structured learning speeds things up
A clear path removes a lot of frustration.
Jumping between random tutorials can leave gaps in your understanding. A structured approach helps you build skills in the right order—which is exactly what Dattebayo is designed to do.
The 3 rules to remember when drawing in perspective
Think in forms, show depth clearly, and stay consistent with your angle.
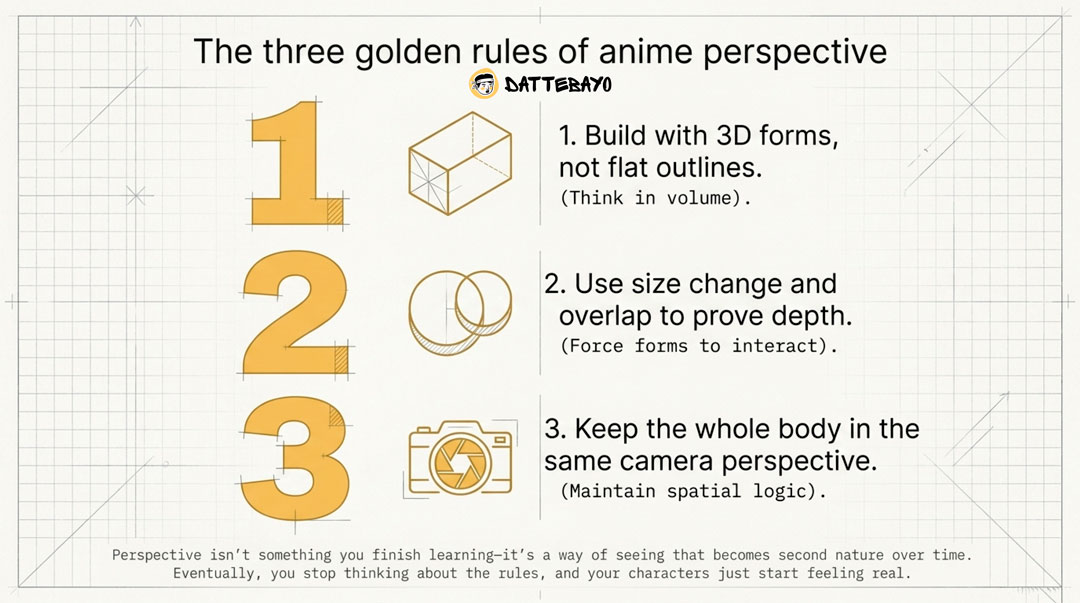
If you remember nothing else:
- Build with 3D forms, not flat outlines
- Use size change and overlap to show depth
- Keep the whole body in the same perspective
Everything else builds from there.
FAQ
How do you draw a full anime body in perspective as a beginner?
Start with a clear viewing angle, build using simple forms, adjust proportions for depth, and reinforce with overlap. Add details after the structure works.
Why do my anime poses look distorted instead of dynamic?
Usually because the perspective is inconsistent. Dynamic poses exaggerate correct perspective—distortion happens when parts don’t follow the same spatial logic.
Can I learn perspective without using grids?
Yes. Focus on forms, angles, and observation. Grids help, but they’re not required for character drawing.
What’s the easiest way to practice foreshortening daily?
Draw simple limbs coming toward the viewer using references. Keep it short and repeat often.
What references should I use to improve perspective in anime?
Photos, pose tools, 3D models, and anime stills all work. Variety helps you understand how forms behave in space.
Do I need to learn vanishing points for character drawing?
Only at a basic level. Understanding eye level and direction matters more than technical precision.
How long does it take to get better at perspective drawing?
You’ll likely see improvement within weeks if you practice consistently. Real confidence builds over time.
Why do my characters still look flat even after learning perspective?
You’re probably missing overlap, strong size differences, or consistent angles. Perspective works as a combination of cues, not a single trick.
Perspective isn’t something you “finish” learning—it’s something you get more comfortable with over time. The more you draw with it in mind, the more natural it becomes.
Eventually, you stop thinking about it—and your characters just start feeling real.